Sticky element in Axure
In a previous article on the blog, we have seen how to prototype a fixed-positioned menu in Axure. I realized this was [...]
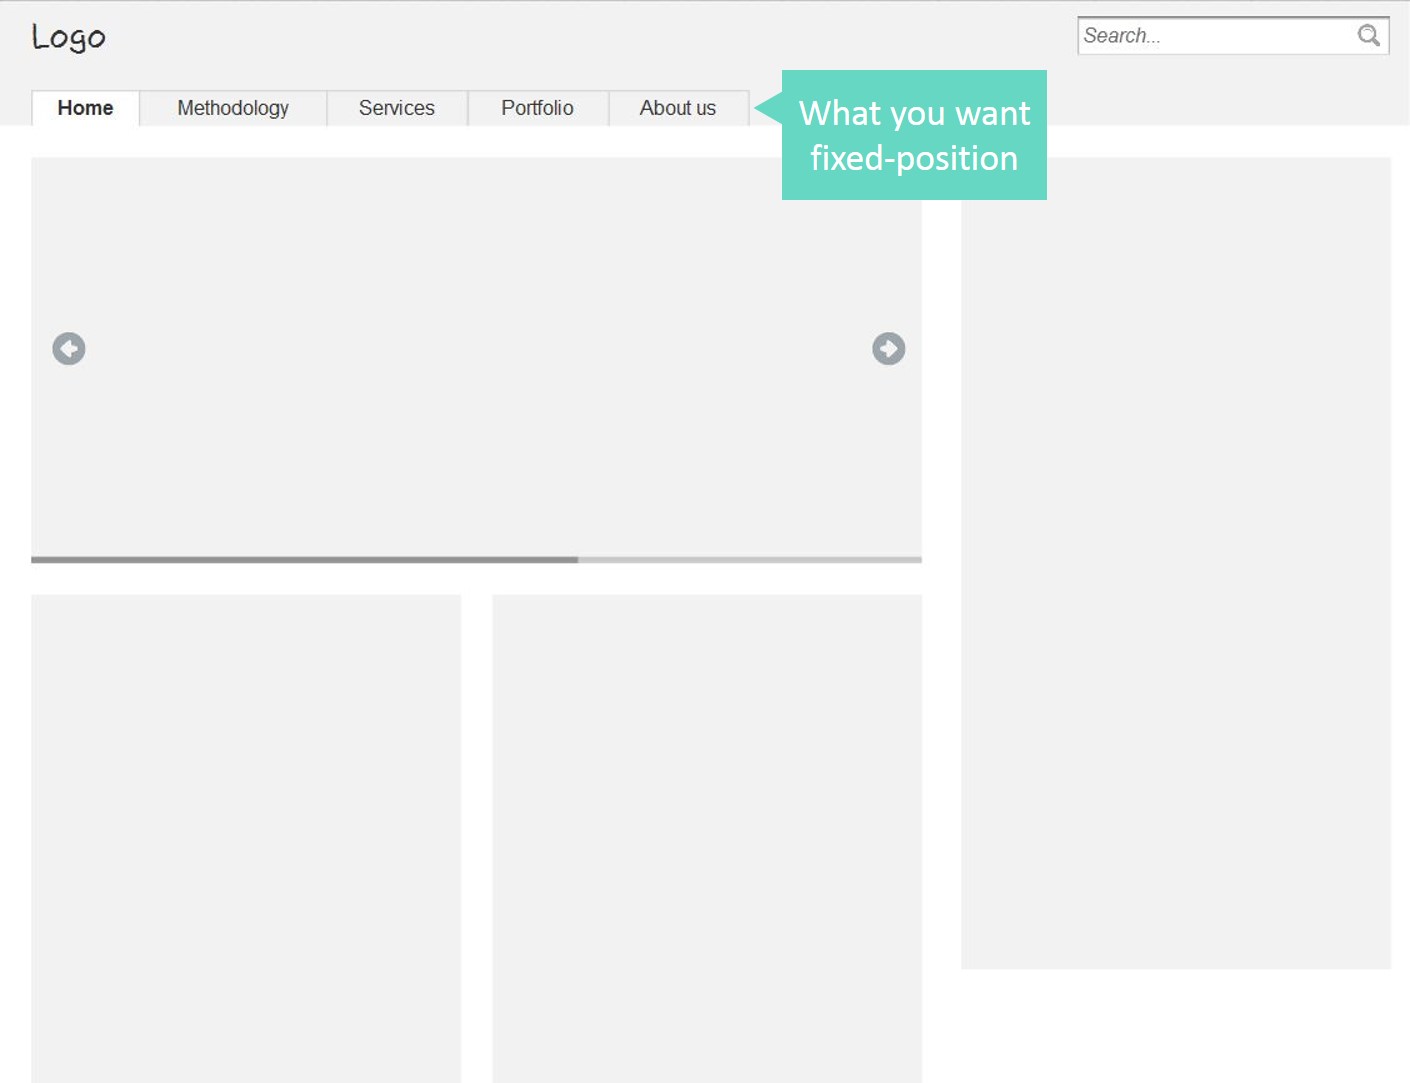
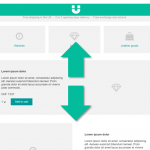
Fixed-position menus are often used on websites or applications today. They allow the menu (or any other toolbar) to remain always visible on top of the screen, no matter how far the users scrolls down. This interaction allows to create higher pages, without worrying about the user getting lost in the sitemap or worrying about finding the navigation again. Axure offers great interaction programming possibilities. And guess what? It is possible to prototype a fixed position menu with Axure, which only sticks to the top when relevant. Here is a ste-by-step tutorial to create a fixed position Axure element, including Axure source and prototype demo on Axshare.
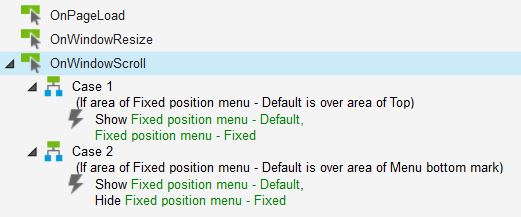
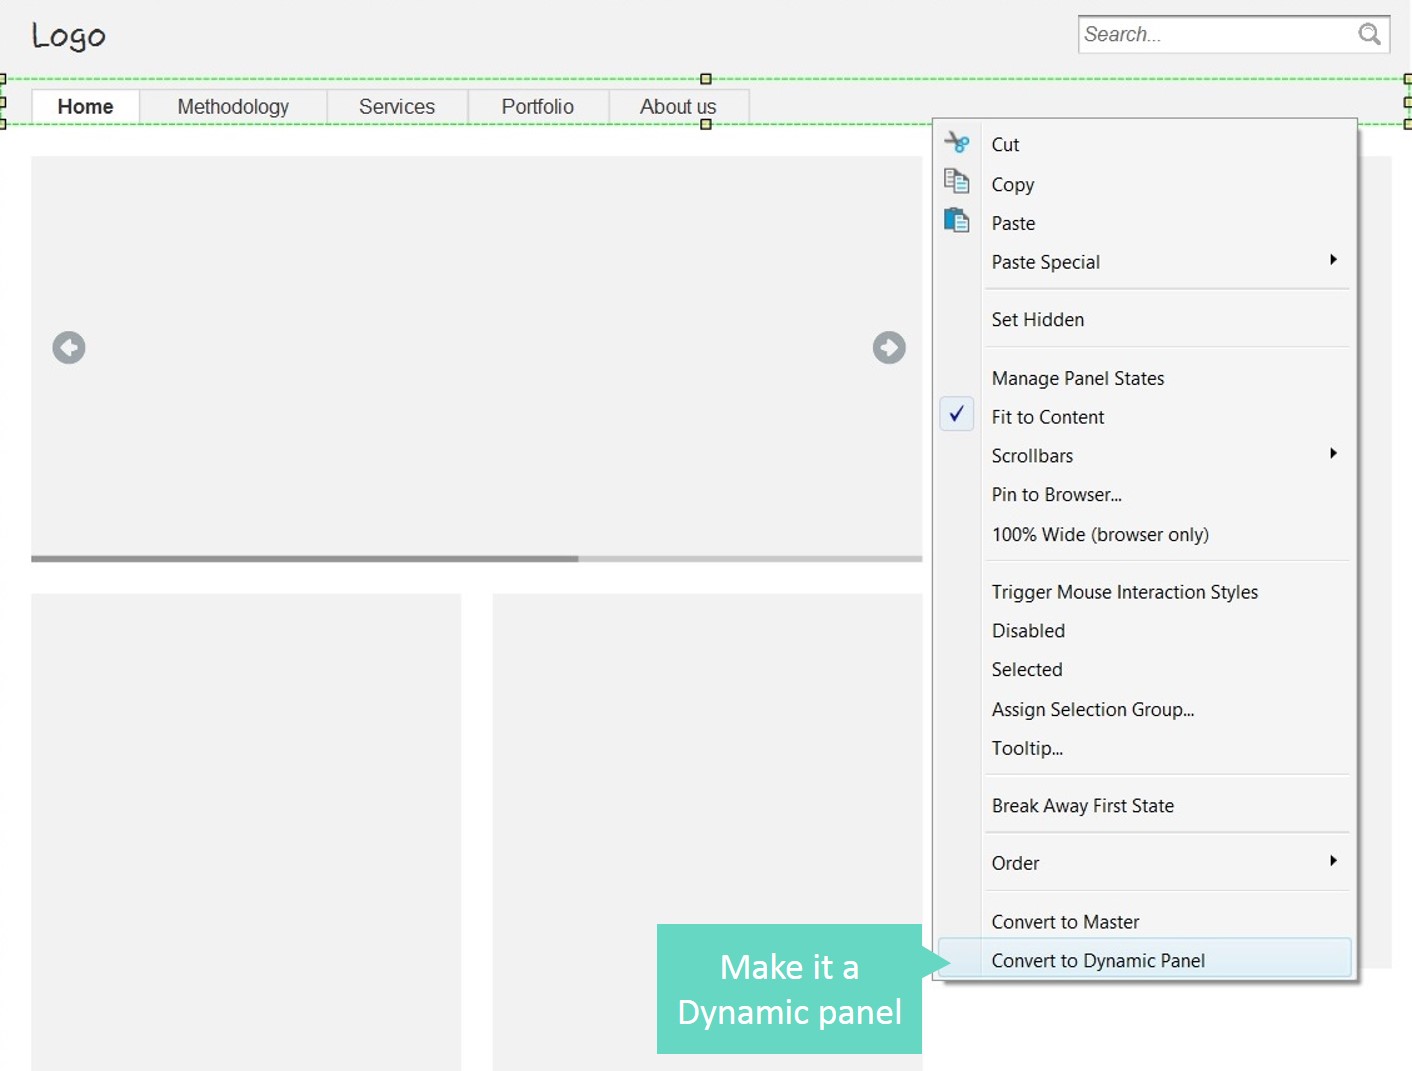
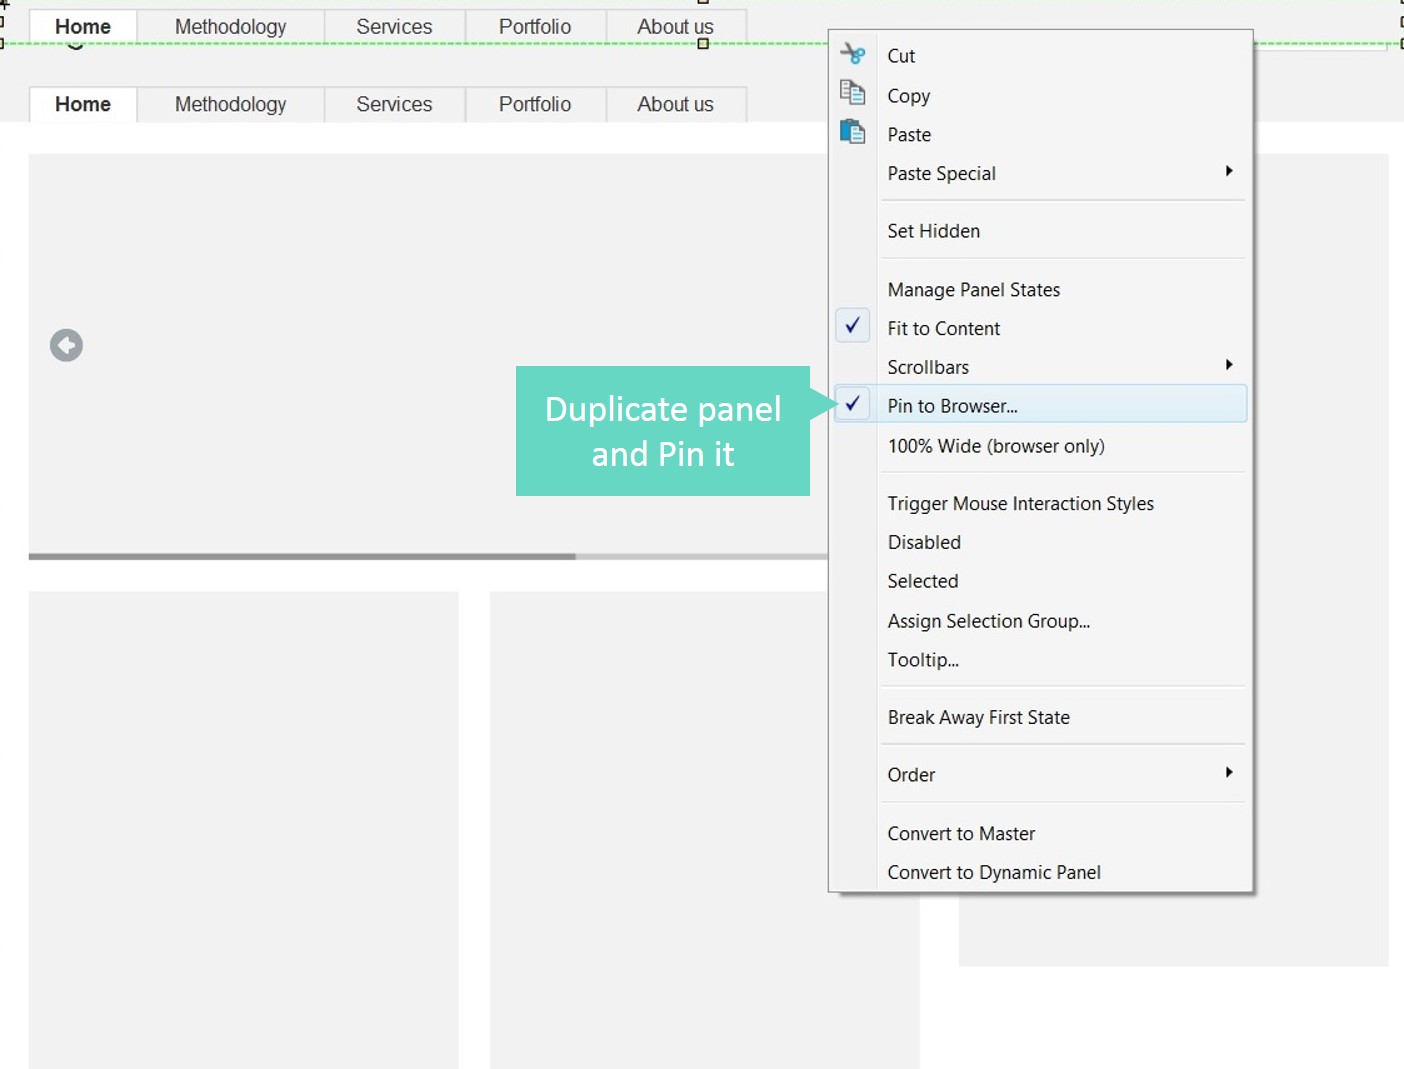
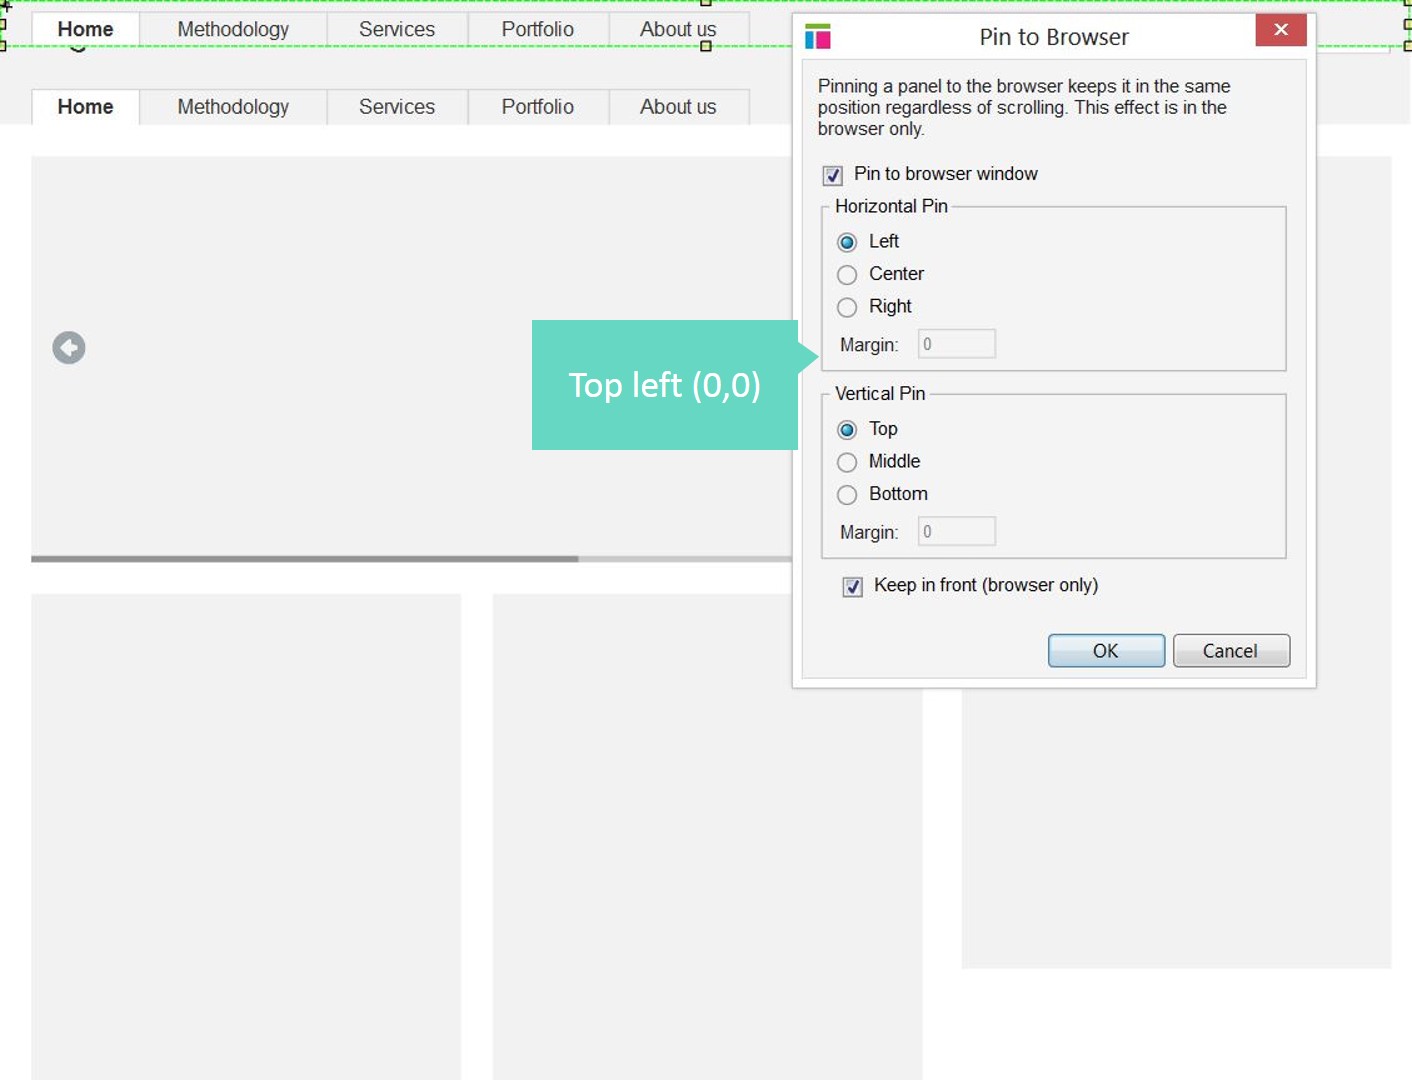
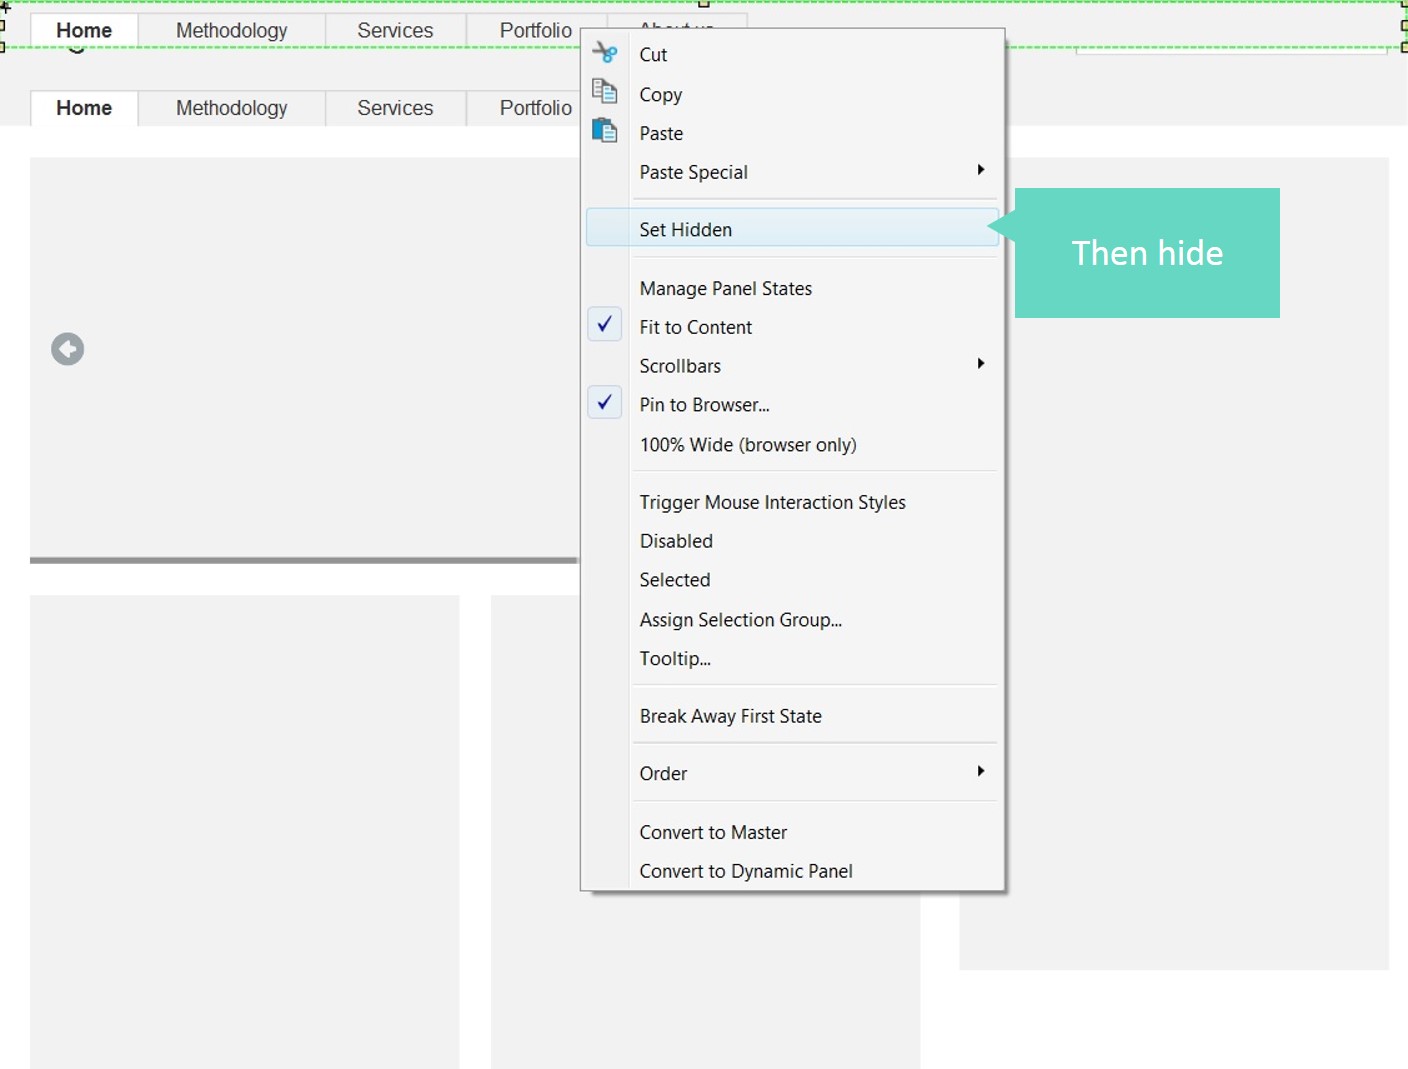
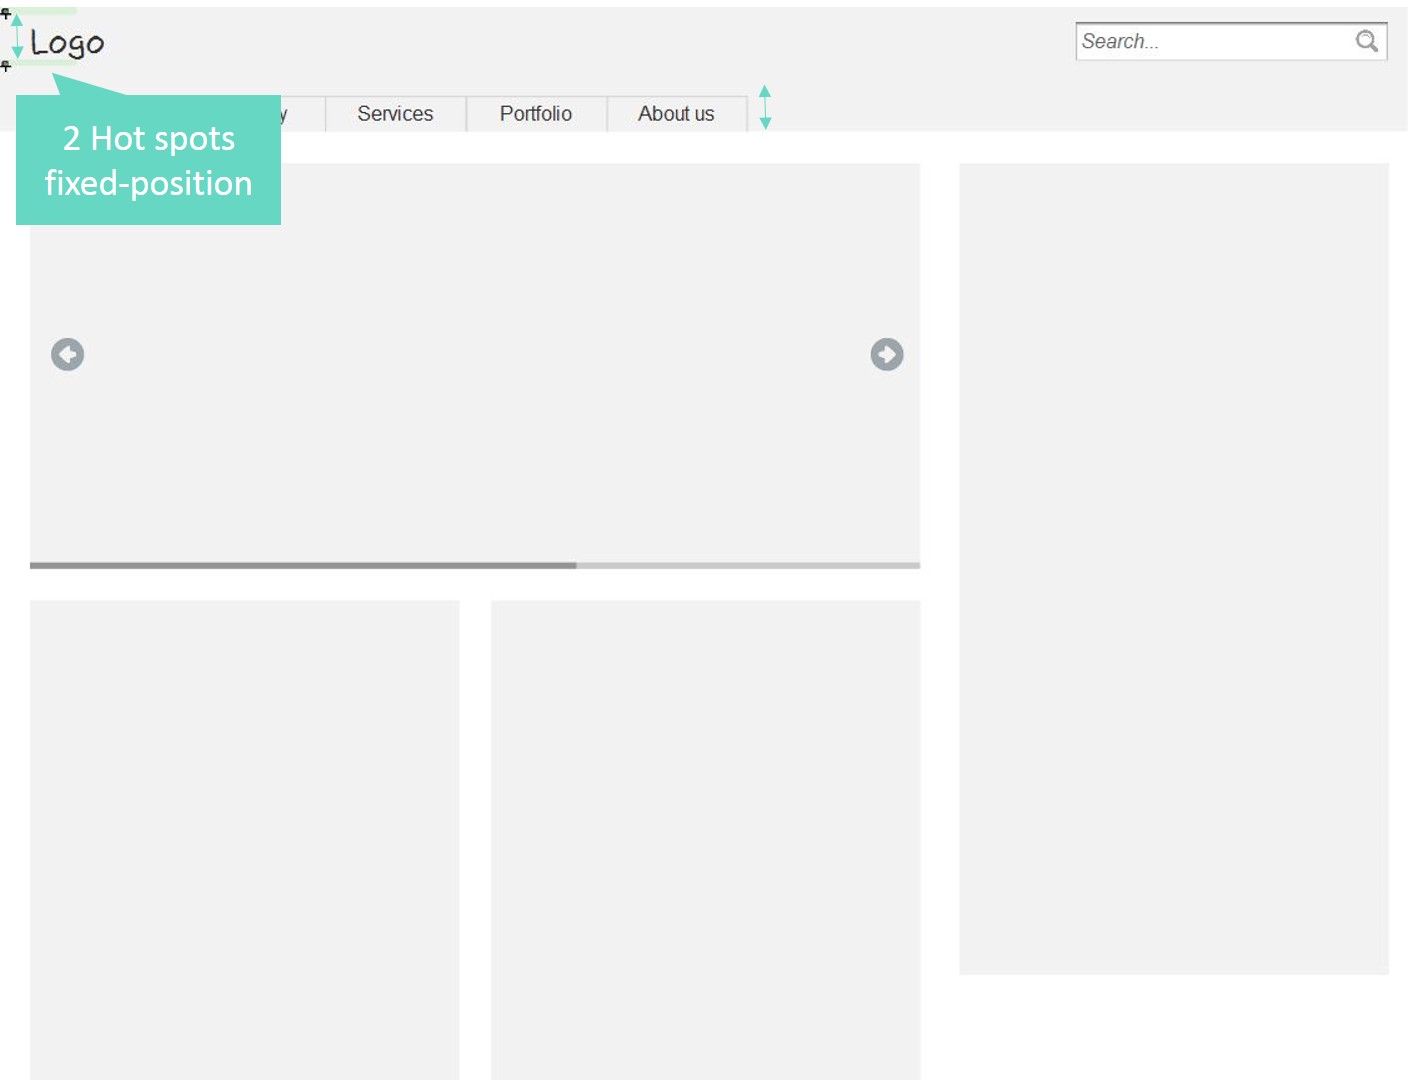
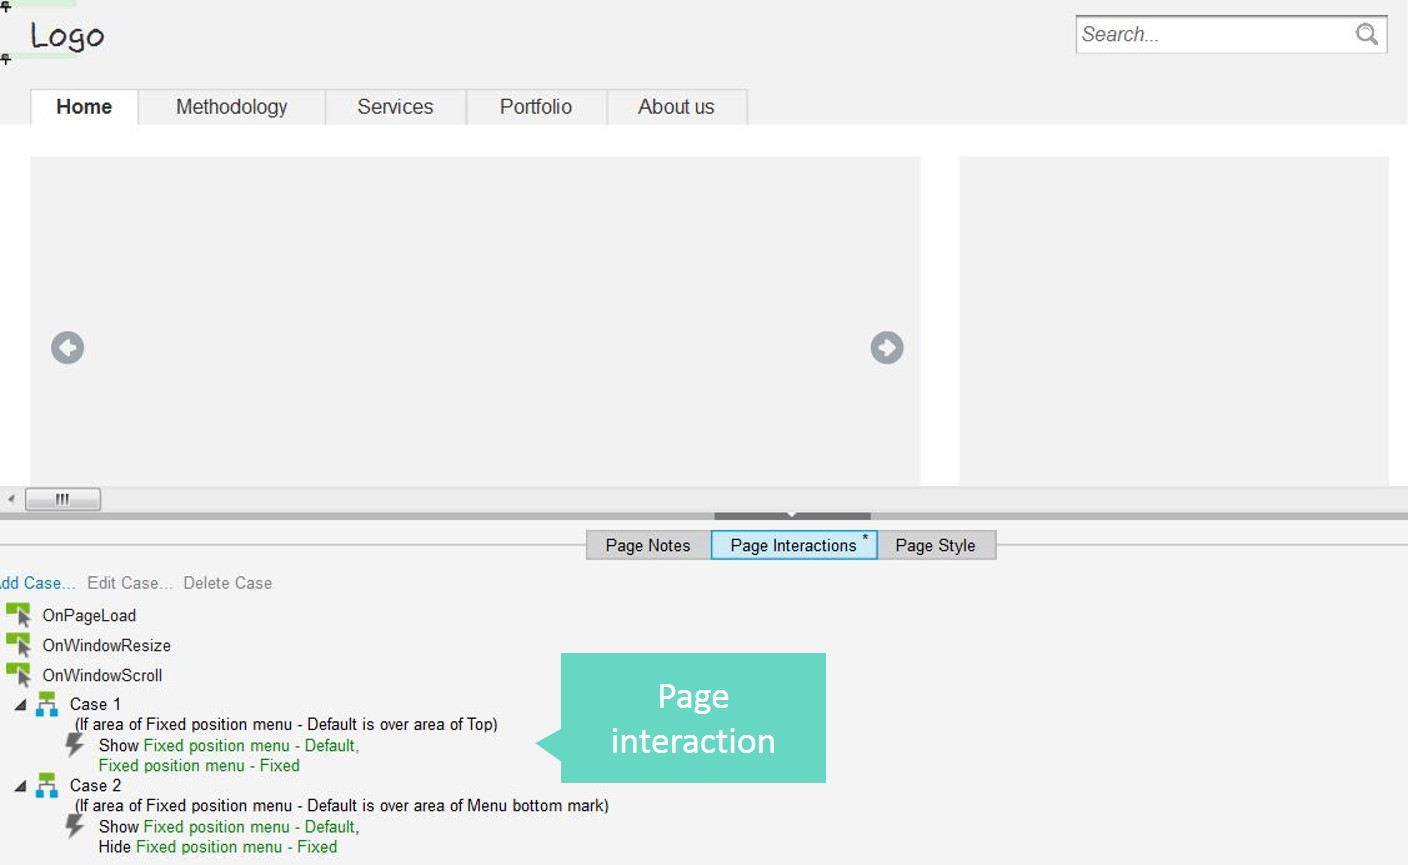
I won’t say it’s simple, but this tutorial should give you a hand. The idea is to use 2 versions of the menu: one standard, and one set as Pin-to-browser on top left. We switch from one version to the other according to scroll, using 2 fixed-position Hot spots to define areas. It definitely gives a wow-effect to any presentation! Ready?
View the HTML prototype demo or download Axure source example
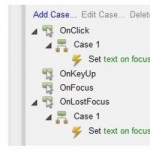
Before we start, make sure you are familiar with Hot spots and Pin-to-browser (available on a right click on a Dynamic panel.)
In a previous article on the blog, we have seen how to prototype a fixed-positioned menu in Axure. I realized this was [...]
A few years ago, I published a step-by-step tutorial to create a sticky version of a navigation menu in Axure, [...]
Simple text fields are a basic widget in Axure library, and one often needed. Instead of just dropping a text field on [...]